Fun With Floors
Our original floor was doug fir. We had nice wide planks of about 5 inches. But when the previous owners added on to the home they merely made their new plywood sub floor match the height of the old floor and then they carpeted in a nice avocado green shag. Ooooh la la.
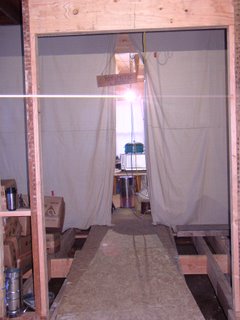
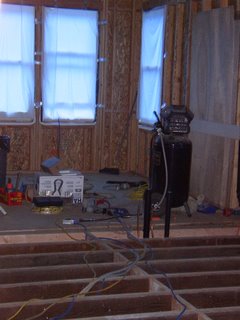
When we rebuilt the additions and gutted the downstairs, we pulled all of the original floor out and saved it in our garage. Our house looked like this at this point:


Lovely, don't you think?
With the house down to the floor joists, it gave us an opportunity to take care of some HVAC issues, plumbing, electrical wiring, replacing any rotted boards, insulation, as well as cleaning up 125 years worth of people leaving crap in the crawl space. When we were done with this, we laid a plywood sub-floor over the entire house…It was good to have something to walk on—I was tired of slipping, falling, and getting splinters in my butt.
But now, what to do? We didn’t have enough wood to cover the entire house. I checked on some mills and the cost of milling wood to 5 inches was astronomical (about $12.00 sf—unfinished)…so I looked for alternatives.
I came across a company called "Beyond Waste." They recycle old 2X4’s and re-mill them into flooring—they have great character: nail holes, staining, and good graining. And the price was right: $4.00 per sf. The problem was the boards only come in 3 ½ inch widths…hmmmm.
We decided that since our old boards were already up, we would re-lay them with the new 3 ½ inch boards in a random pattern. Problem solved.
We also decided to "flip" our old boards (that way we didn’t have to sand through the various layers of paint and black "mastic" that was on most of the boards). This turned out to be one the best things we could have done, because on the stairs, where we couldn’t flip the boards, sanding/stripping/scrapping off the paint was a real PIA. It would have driven me to poking out my eyes. Glad we flipped em.
After 120 hours, the floor was laid…with rough cut side of the "old boards"facing up and mixed and matched with the newly milled "new boards." At this point, I thought we might have made a mistake…The place looked like the OK Corral…and the color difference between the old and the new—along with the difference in size really was startling. But we moved on….cuz what else were we gonna do?
Although we did our best matching the tongue and grooves, the floor was pretty rough—the rough sawn side of the old boards and the difference in wood meant that we would have a lot of sanding to do….We started by using an edger (four trips around all the walls using 36,60,80 and then 100 grit paper). We then took a drum sander with 24 grit paper and sanded on the diagonal. This did a good job of "leveling" the floor. We then went with the grain with 36,60, and 80 grit paper. Finally, we switched to a vibrating sander (with a big pad) and finished with 80, 100, and 120 grit…The vibrating sander worked great at finishing while the drum sander really helped bring the boards into shape. We then thoroughly swept, sucked, tacked up all the dust. (Dust will kill a floor).
We then applied Zinsser sealer (wax free) which really "popped" the grain. We had planned on re-applying a tinted sealer on the new wood (to help it match the color of the old wood), but after seeing the wood sanded and sealed, we really liked the look and decided to skip this part…
We then started applying Fabulon polyurethane…6 coats in total. In between coats we would sand with a 320-400 grit screen using the vibrating sander and, again, clean in between coats. We did not sand after the final coat—instead we will use Howard’s polishing compound and the vibrating sander to smooth out the floor, and finally use Howard’s Wax n’ Feed to bring out the shine—but that will be done right before we move our furniture back in. Right now, even in all of it's filthy glory, it looks pretty good:


